Sending notifications
Contact notification
It would be great if we receive a notification when a user tries to contact us.
For this tutorial we will use a free service that instantly generates a unique URL through which you can receive and view webhook payloads in real time.
💡 NOTE
You could replace this service with a workflow automation system, with your CRM webhook, with Slack hooks etc.
By navigating to the site https://webhook.site/ you will receive a unique url, as in the image below:
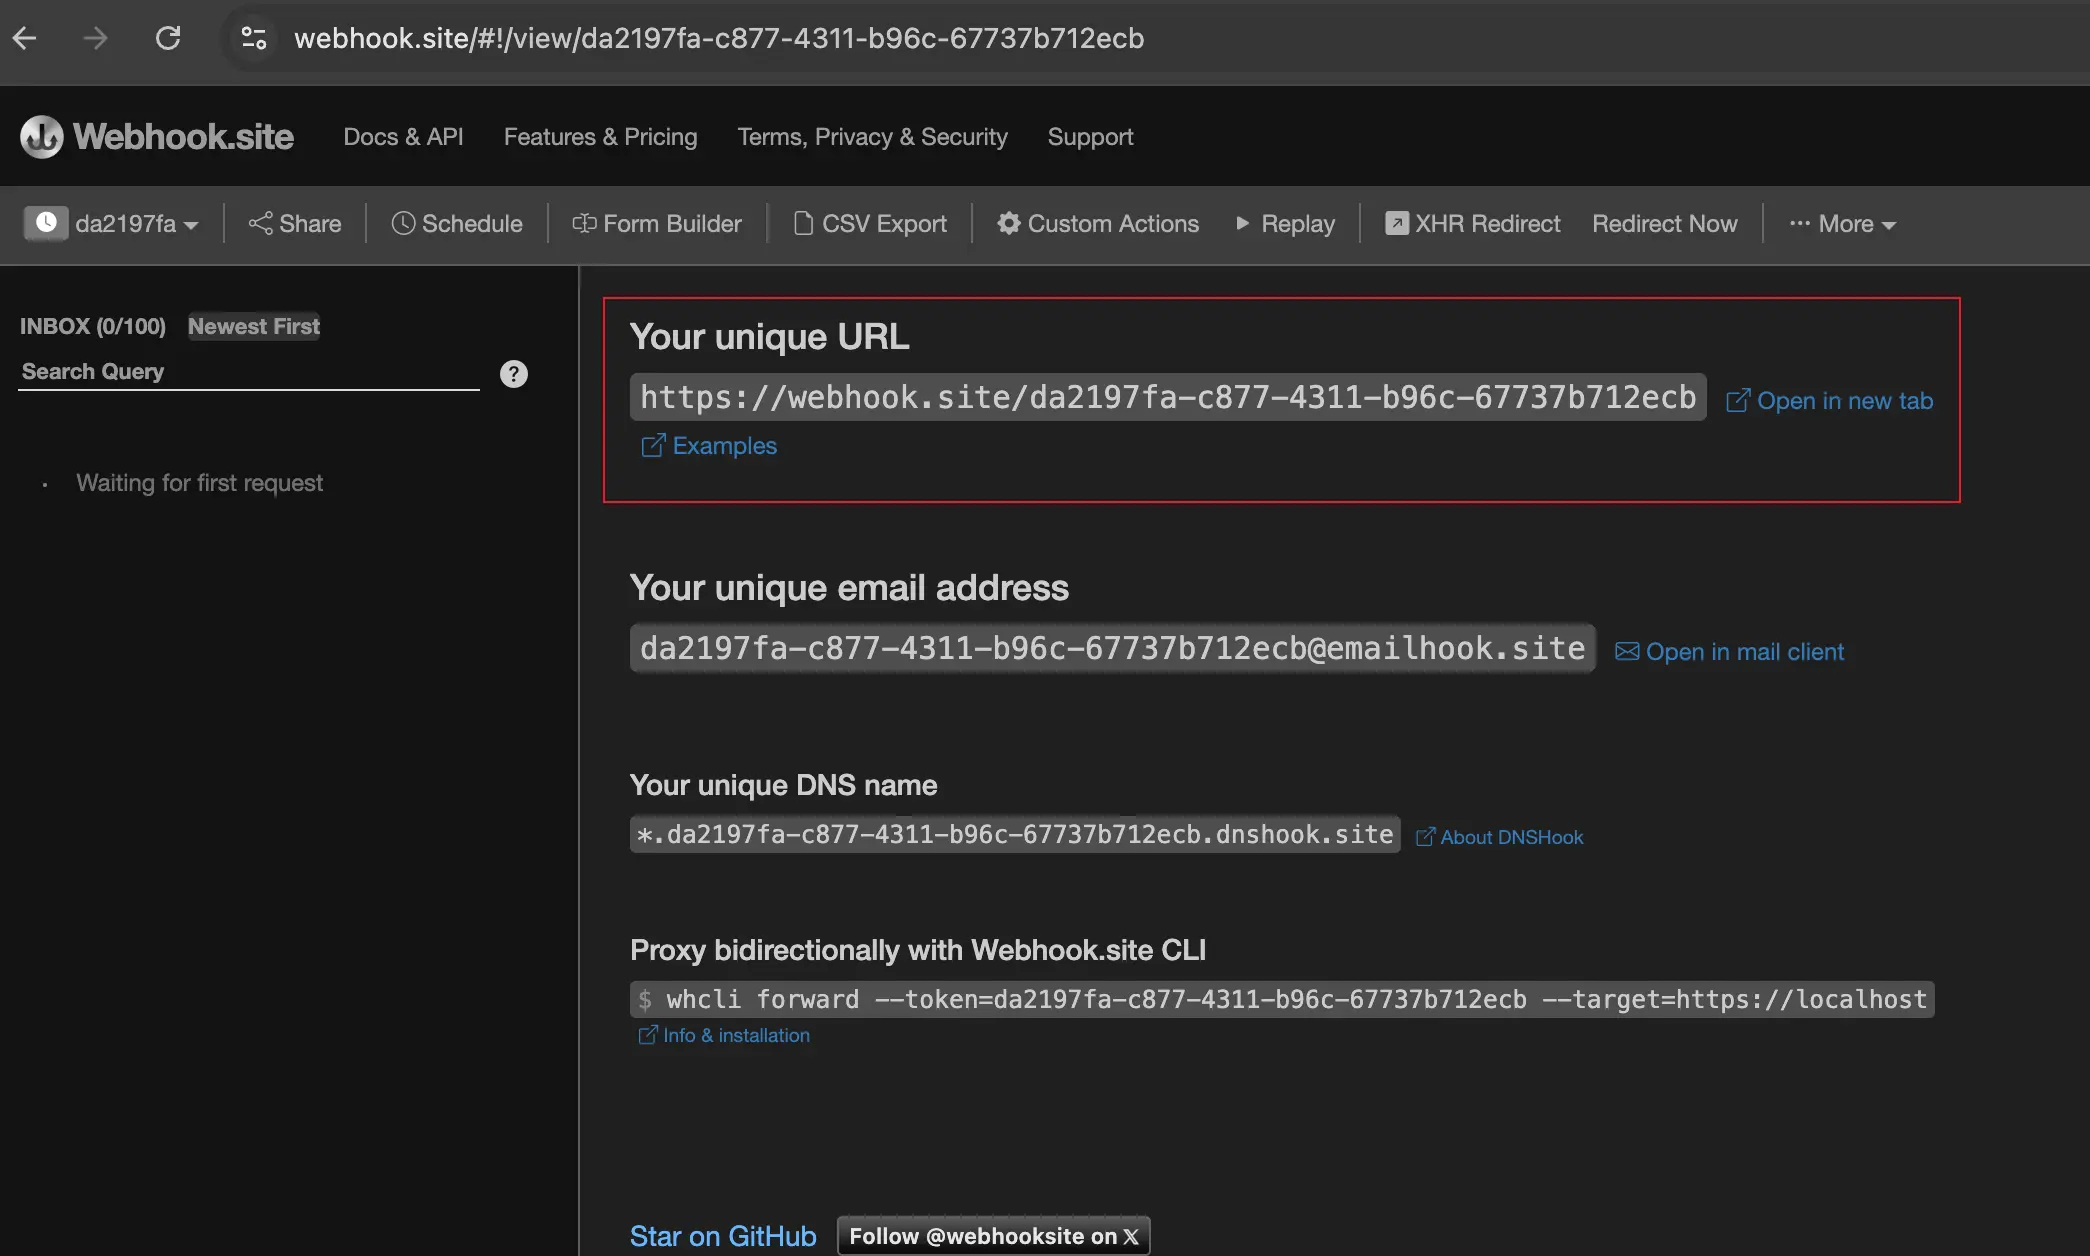
Take note of the url under the “Your unique URL” title.
Once we have a webhook we can proceed to create a new action called notify.js
(in the packages/contact folder).
The directory structure will be:
contact_us_app
├── packages
│   └── contact
│       ├── create-table.js
│       ├── notify.js
│       ├── submit.js
│       └── write.js
└── web
└── index.html
Place this content inside the notify.js file:
// notify.js

//--param NOTIFICATION_URL $NOTIFICATION_URL

function main(args) {
    const { name, email, phone, message } = args;

    const subject = `New contact request from Apache OpenServerless`;
    const payload = {
        subject,
        name,
        email,
        phone,
        message,
    };

    console.log("Built message", payload);

    return fetch(args.NOTIFICATION_URL, {
        method: 'POST',
        headers: {
            'Content-Type': 'application/json',
        },
        body: JSON.stringify(payload),
    })
        .then(response => {
            if (!response.ok) {
                console.log("Error sending message. Status code:", response.status);
            } else {
                console.log("Message sent successfully");
            }
            return {
                body: args.body,
            };
        })
        .catch(error => {
            console.log("Error sending message", error);
            return {
                body: error,
            };
        });
}
💡 NOTE
In this case, we don’t need to annotate the action as web. This because this action will be invoked in a sequence: so it’s an internal action and is not exposed as an api.
This action has the args.NOTIFICATION_URL parameter, which is the
webhook. It also has the usual 4 form fields parameters that receives in
input, used to build the text of the message. The action will return the
body of the response from the webhook.
The NOTIFICATION_URL may contains different values between a development environment
and a production one.
No problem! Apache OpenServerless deployer supports .env file.
Create a .env file under the package directory.
The directory structure now will look like:
contact_us_app
├── packages
│   ├── .env
│   └── contact
│       ├── create-table.js
│       ├── notify.js
│       ├── submit.js
│       └── write.js
└── web
└── index.html
Inside the .env file put this content:
NOTIFICATION_URL=<url>
Replace <url> with the url received from webhook.site.
Now deploy everything as usual, giving:
ops ide deploy
Creating Another Action Sequence
We have developed an action that can send a message as a standalone action, but we designed it to take the output of the submit action and return it as is. Time to extend the previous sequence!
Note that it will send messages for every submission, even for incorrect inputs, so we will know if someone is trying to use the form without providing all the information. But we will only store the fully validated data in the database.
Let’s create the sequence, and then test it:
ops action create contact/submit-notify --sequence contact/submit-write,contact/notify --web true
You should see this output:
ok: created action contact/submit-notify
We just created a new sequence submit-notify from the previous
sequence submit-write and the new notify.
If you want to get more info about this sequence, you can use the
ops action get command:
ops action get contact/submit-notify
You should see this output:
{
    "namespace": "openserverless/contact",
    "name": "submit-notify",
    "version": "0.0.1",
    "exec": {
        "kind": "sequence",
        "components": [
            "/openserverless/contact/submit-write",
            "/openserverless/contact/notify"
        ]
    },
    ...
}
See how the exec key has a kind of sequence and a list of
components that are the actions that compose the sequence.
Now to start using this sequence instead of using the submit action, we
need to update the web/index.html page to invoke the new sequence.
As before let’s grab the url:
ops url contact/submit-notify
<apihost>/api/v1/web/openserverless/contact/submit-notify
And update the action inside the file web/index.html:
<form method="POST" action="/api/v1/web/opstutorial/contact/submit-notify"
    enctype="application/x-www-form-urlencoded">
Don’t forget to re-publish everything with ops ide deploy.
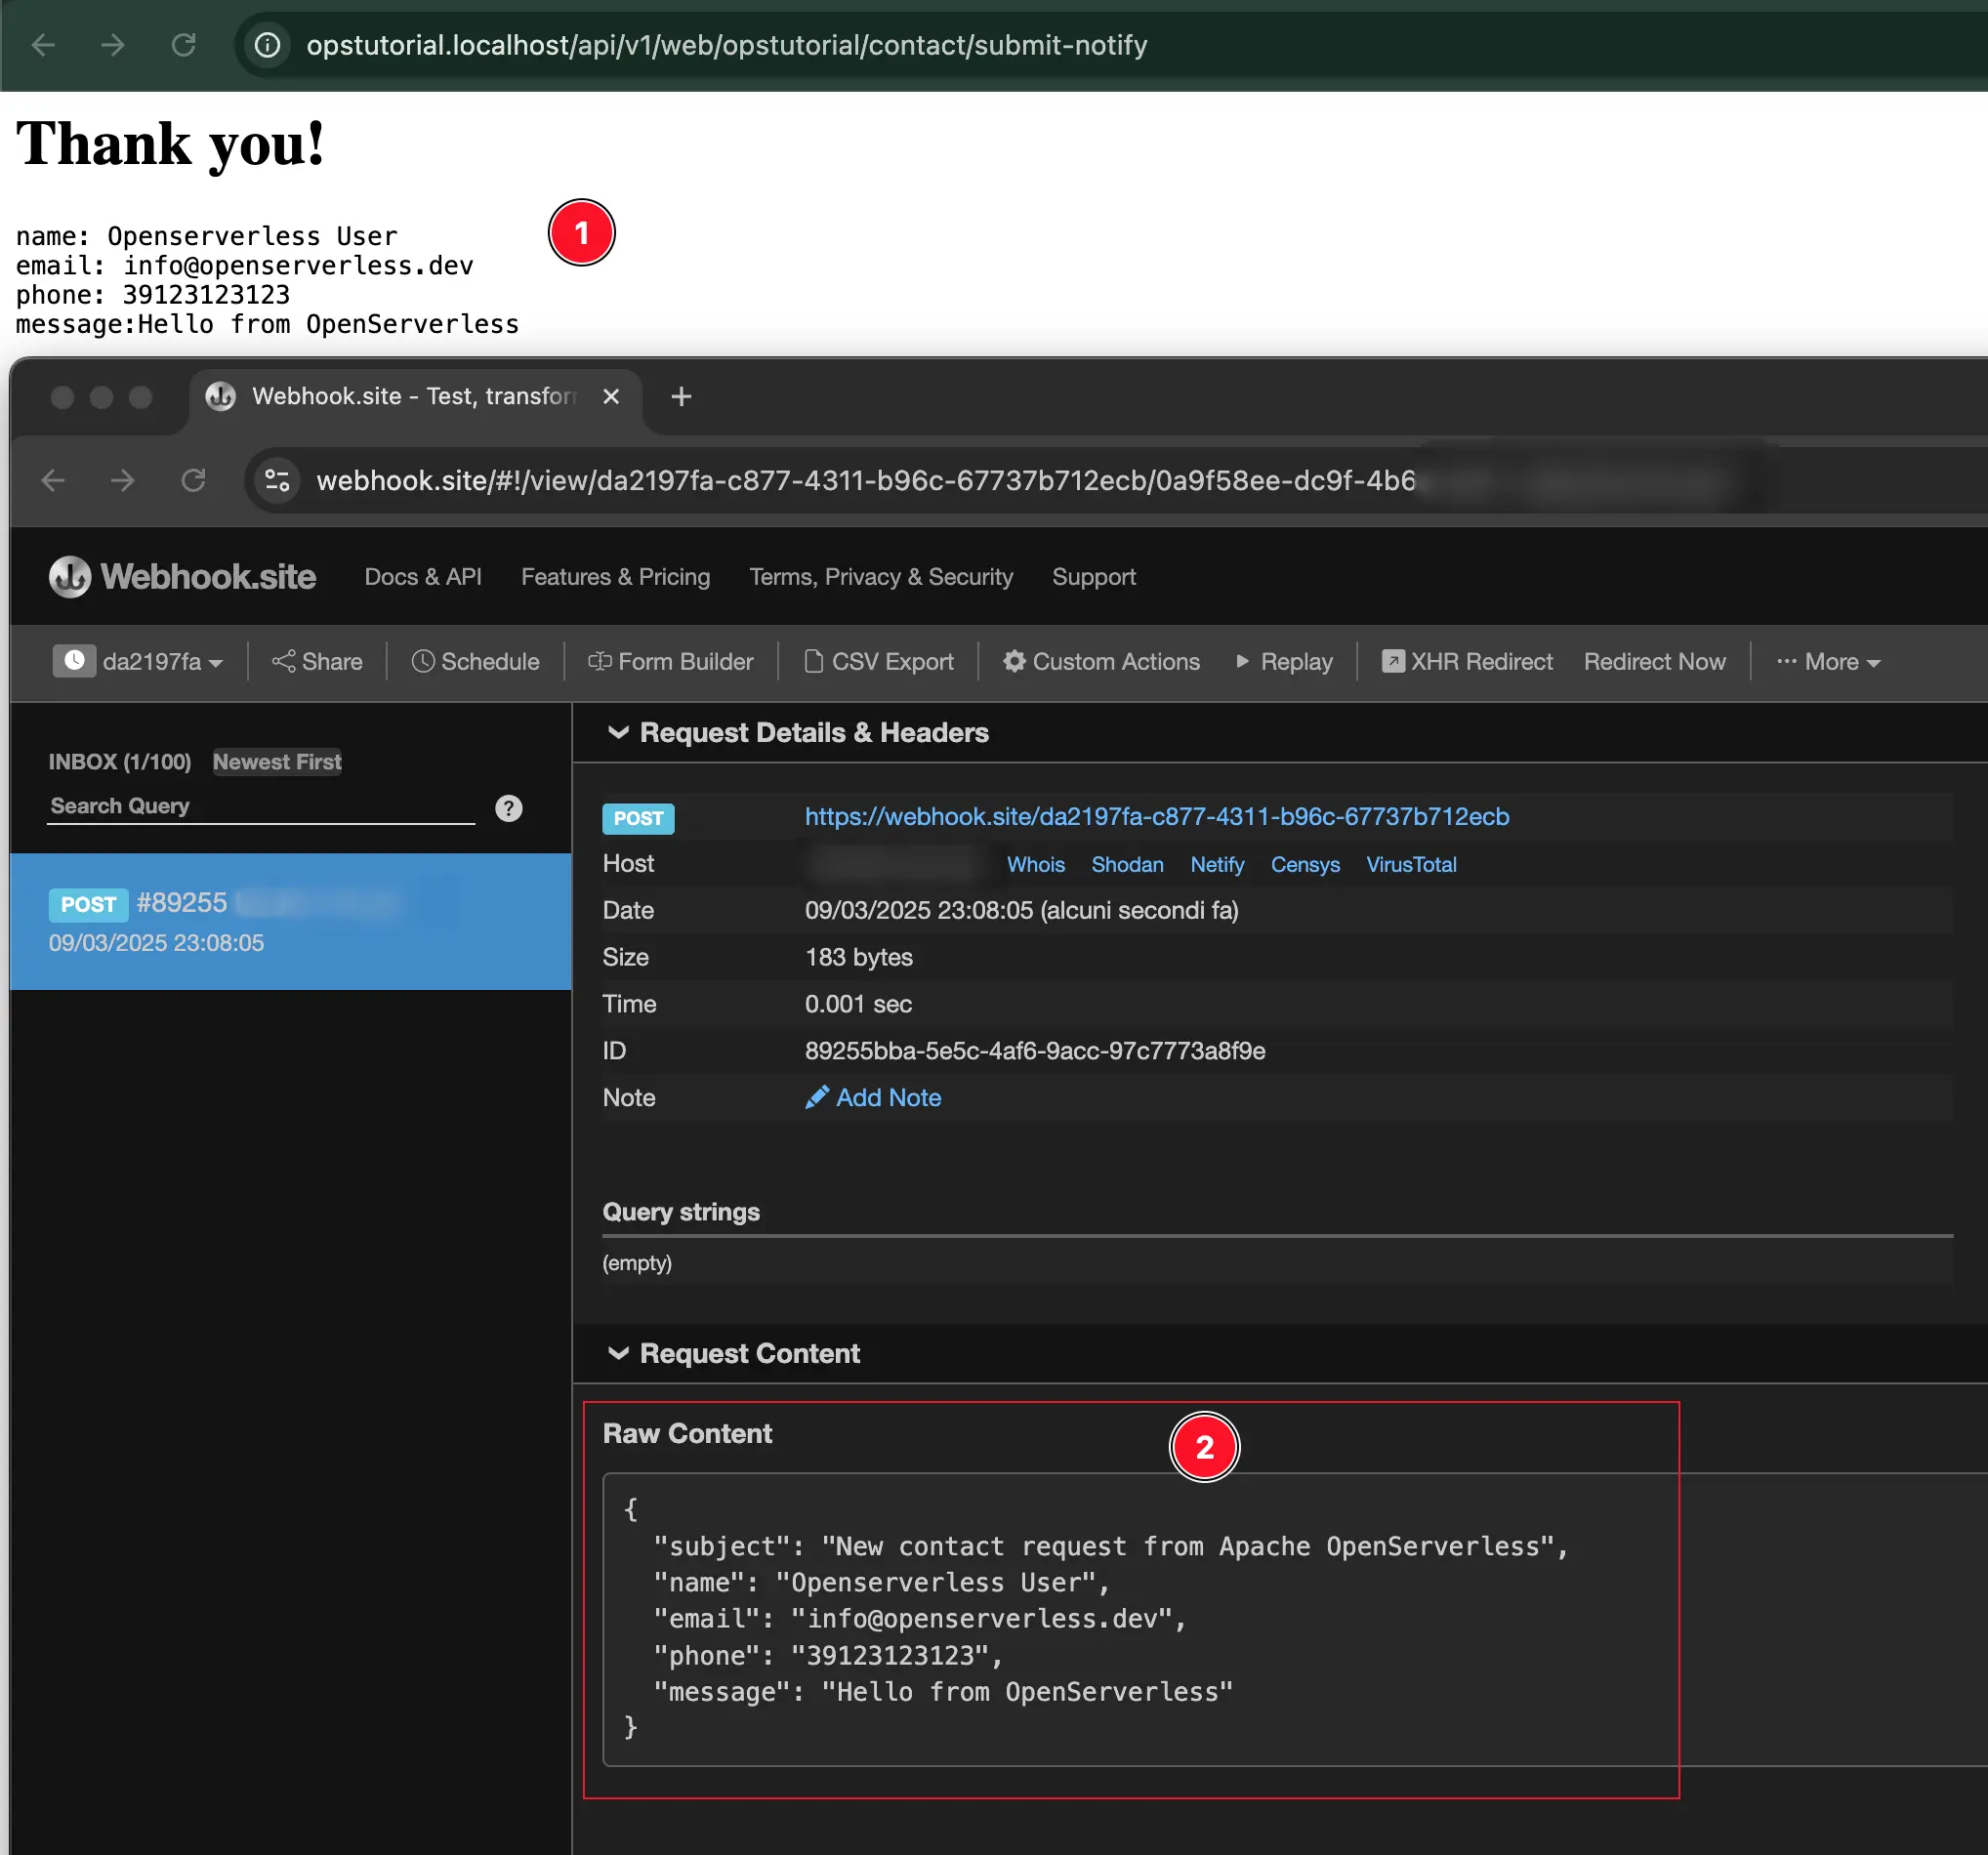
Now try to fill out the form again and press send! It will execute the sequence
and you will receive the message piped from action /contact/submit-write to
/contact/notify.
The tutorial introduced you to some utilities to retrieve information
and to the concept of activation. Let’s use some more commands to
check out the logs and see if the message was really sent.
The easiest way to check for all the activations that happen in this app with all their logs is:
ops activation poll

Enter Ctrl-c to exit.
Polling for activation logs
This command polls continuously for log messages. If you go ahead and submit a message in the app, all the actions will show up here together with their log messages.
To also check if there are some problems with your actions, run a couple
of times ops activation list and check the Status of the
activations. If you see some developer error or any other errors, just
grab the activation ID and run ops logs <activation ID>.